CheckoutHow to Integrate Shopify with Your Checkout
How to Integrate Shopify with Your Checkout
To integrate your Shopify store with the checkout, you will need the following credentials:
- Store URL — Subdomain of your Shopify store. This value is used to correctly identify the store origin during communication with the API.
- Client ID — Public identifier of the Shopify application. This value is used during the authentication process to identify your application with the Shopify API.
- Secret — Private key associated with your Shopify application. This credential must be kept strictly confidential.
Important: Authentication requires the checkout account and Shopify store to be logged into the same browser. Otherwise, the authentication process may fail.
To obtain these credentials, follow the steps below:
Step 1 - Access Shopify Dev Dashboard
Access your Shopify store and, in the lower left corner, open the Settings.
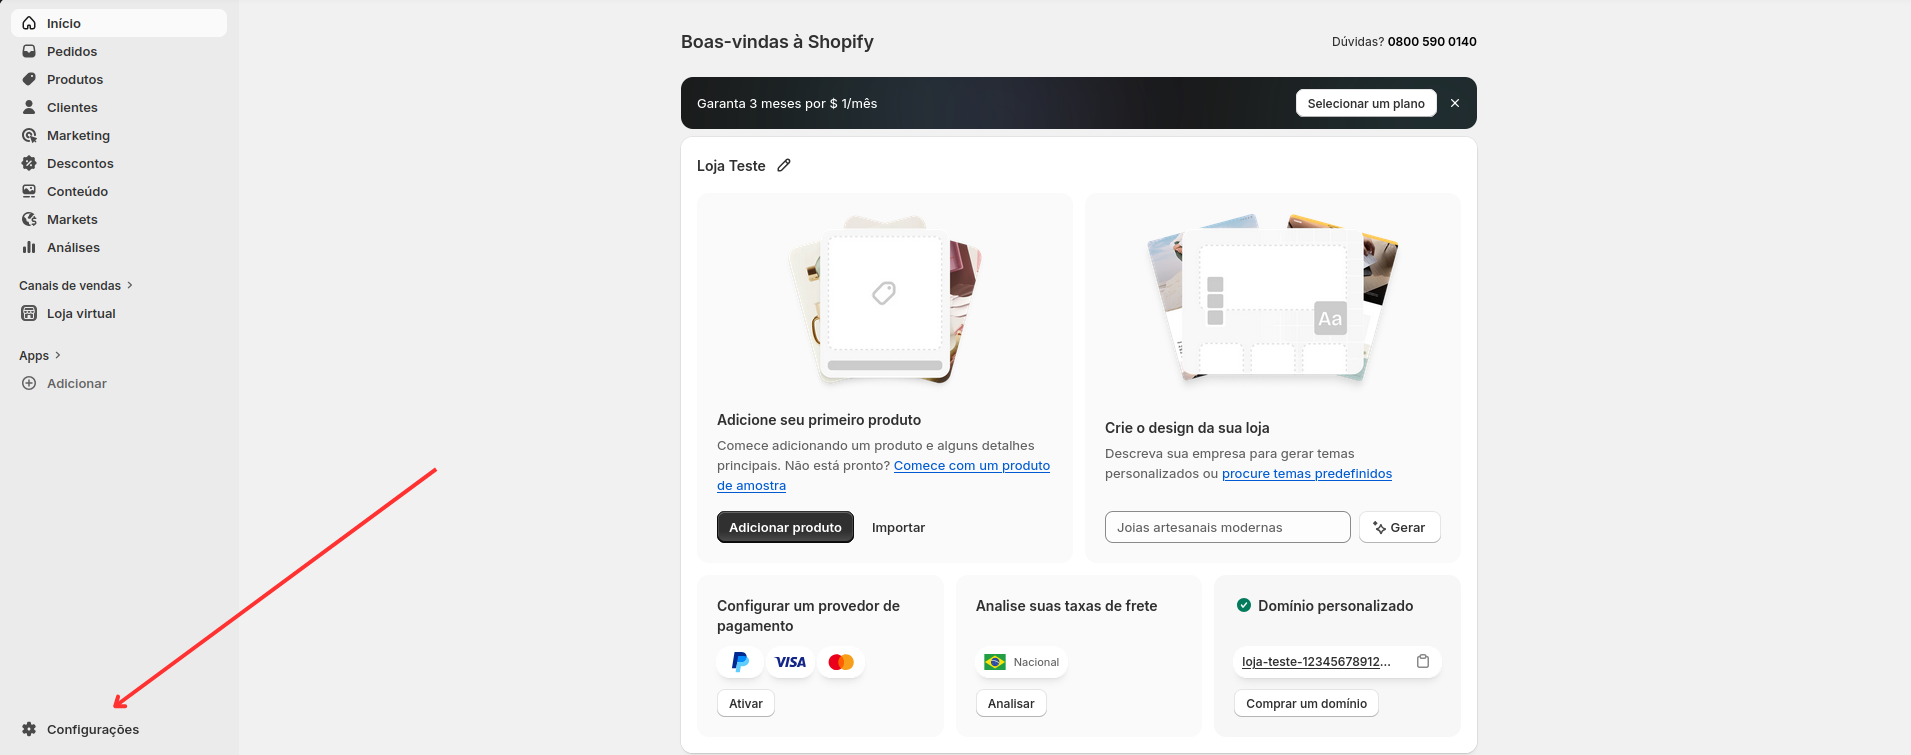
Next, in the side menu, go to Apps and click the option Develop apps.
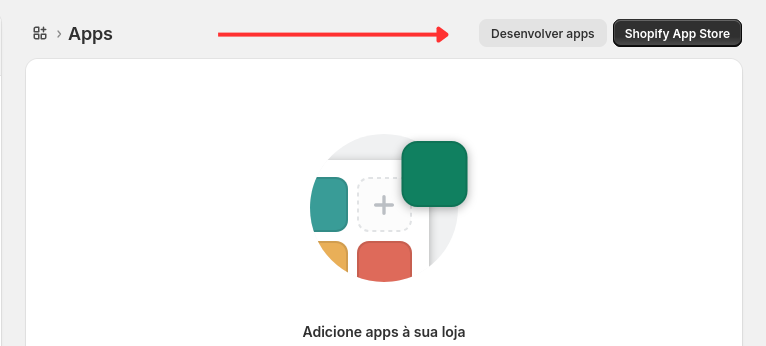
On the next screen, click Develop apps in the Dev Dashboard. Then, you will be redirected to the app creation page.
Step 2 - Create and Install App
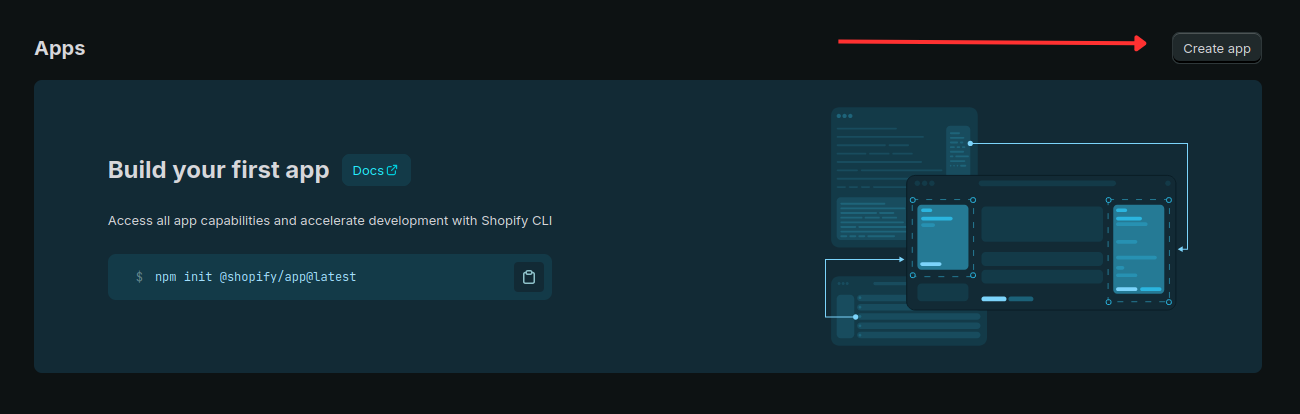
In the dev dashboard, access the side menu Apps, and click the Create app, button, add a name for your app and click Create.
In this step, you will need to configure only the three fields below.
Copy and paste the values below into the corresponding fields:
- App URL — Gateway URL.
https://app.securitypag.com - Scopes — Permissions required for the checkout to properly interact with the Shopify store.
read_customers, write_customers, read_orders, write_orders, read_products, write_products, read_themes, write_themes, read_discounts, read_price_rules, write_fulfillments, read_fulfillments, read_files - Redirect URLs — Redirect URL after authentication.
https://api.securitypag.com/v1/auth/shopify
Example in Shopify:
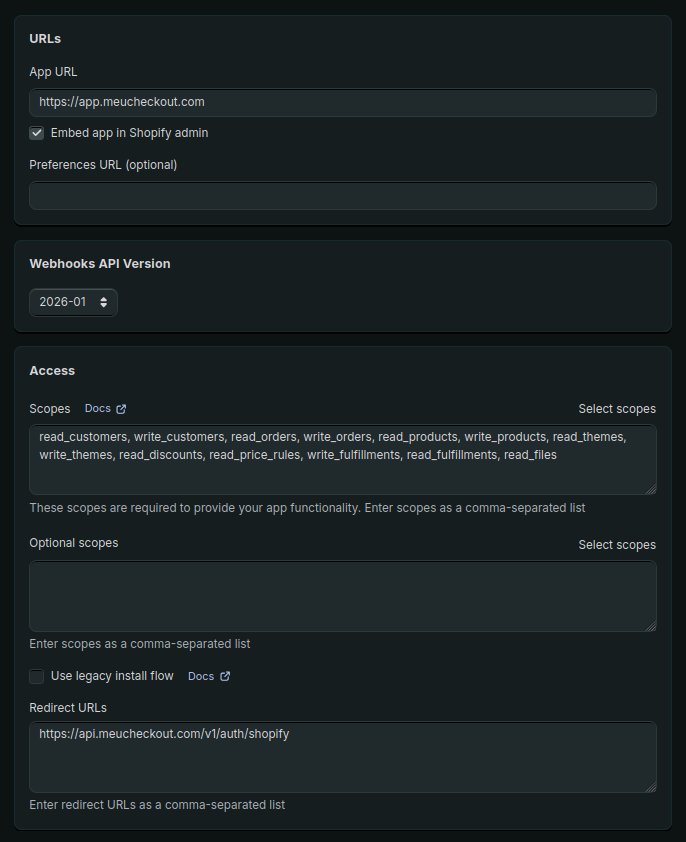
After filling in the three fields, scroll to the bottom of the page and click the Release.
On the next screen, confirm the action by clicking again on Release.
Step 3 - Getting the Credentials
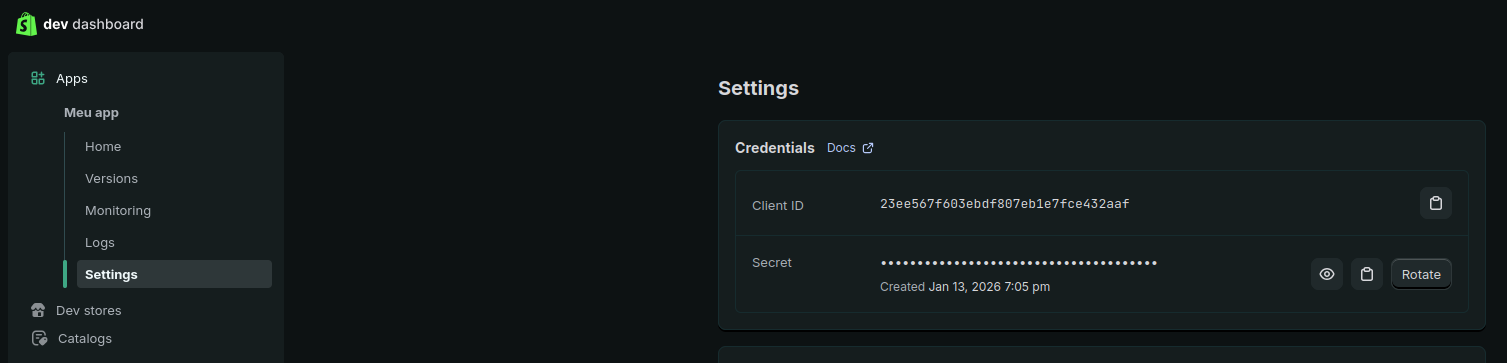
Still in the dev dashboard, access the side menu and click on Settings.
In the Credentialscard, copy only the credentials Client ID and Secret.
After completing this step, you can close the Dev Dashboard tab and return to the main Shopify menu.
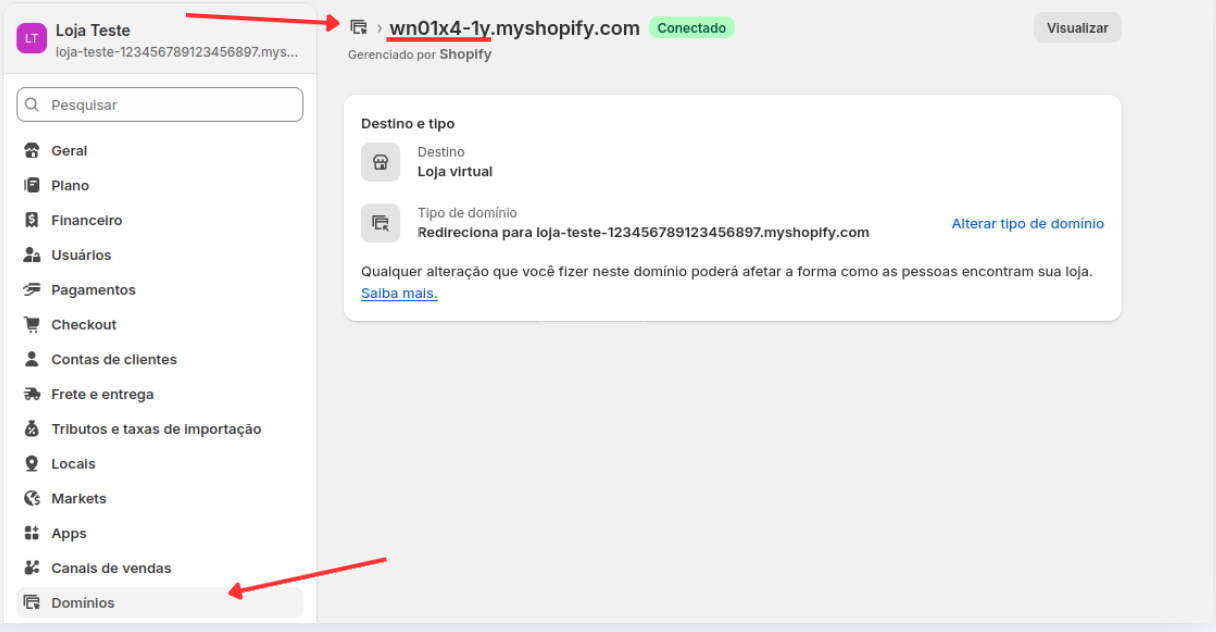
In the Domainstab, open your connected domain and copy the URL, for example:
The URL follows this format: exemplo-123456.myshopify.com, Copy only the part exemplo-123456
Attention: you must use exactly this randomly generated domain. If any other domain is provided, the integration will not work correctly.
After gathering the three credentials, proceed to the checkout integration step.
Step 4 - Integrating with Checkout
In the checkout panel, access the Integrations tab and select Shopify.
Then enter the credentials obtained in the previous step — Store URL, Client ID and Secret — in their respective fields and click Save.
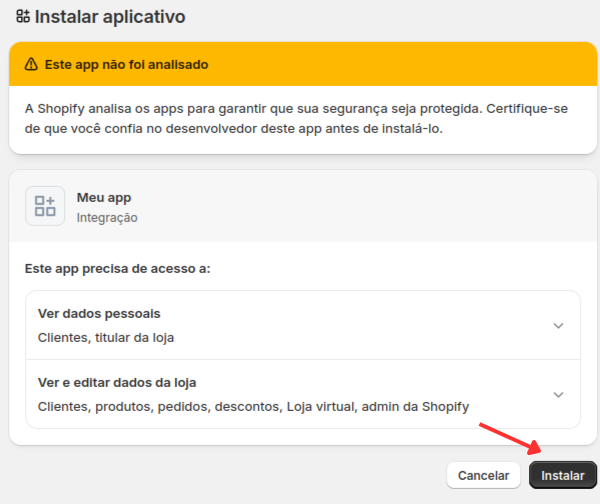
You will be redirected to the Shopify authorization page. Click Install to complete the authorization and return to checkout.
To finish the integration, run the actions Reconfigure theme and Sync products and wait for completion.
After synchronization is completed, all integrated products can be viewed in the Products section of the checkout panel.
You will also receive an email confirmation once the process is completed.
If you need additional assistance, please contact support for guidance during the integration.
From this moment on, your Shopify store will be integrated with the checkout and ready to start selling.
Something wrong on this page? Talk to us